 |
| Diana S |
Showing posts with label Techniques. Show all posts
Showing posts with label Techniques. Show all posts
Thursday, May 19, 2011
Sail Away Summer Mini Swap
Wednesday, May 18, 2011
Summer Mini Swap
 |
| Susan S. Isn't this striking? Susan has used a multitude of mediums here. Embossing Folder, Waterclothing, Desginer Paper, and Punches ; and heat embossing. WOW! Susan is my upline. Great job Susan!!! |
Monday, August 9, 2010
New to Sketch Challenges

 |
| Sketch 1 |
Friday, July 16, 2010
2010 Convention Swap...Final

Here's are the end products of my lengthy convention proto-types. Go back a few days and you'll see the original.
Here are the supplies I used:
Stamps: Artistic Etchings
Ink: Basic Black & Cherry Cobbler (one of my new favs)
Card stock: Basic Black, Very Vanilla, Cherry Cobbler and Sahara Sand
Designer Series Paper: Newspaper Print
Punches: Scallop, Small Scallop & Word
Ribbon: Chantilly
Vintage Wallpaper Embossing Folder, Top Note Bigz Die

These combind my two favorite techniques: vintage & collage.
The sample on the left was sprayed with the new gold glitter mist. All products are Stampin' Up.
Hope you enjoy!
Tuesday, June 29, 2010
Elements of Style Tiles


Monday, June 7, 2010
Sentimental Journey...One More Time!

I've asked how I achieved the red on the navy airplane and luggage. I stamped the image in Night of Navy Ink, then used the Stampin' Write marker where I wanted the 'red' to show. The blending of the navy and red produced this aged look.
The map was sponged along the edges with Real Red and then I used the Night of Navy stamp pad directly on the paper. Then I stamped using Itty Bitty Background dots all over for added dimension. (Sorry Barbara...I truly did not know Stampin' Up would be retiring Itty Bitty Background this year. I am so sorry to see it go!)
Sunday, June 6, 2010
Sentimental Journey #2

Here's another sample using Sentimental Journey. This showcases the ink to paper technique as well as stampin' off to achieve varying shades using the same ink. Again, all Stampin' Up products.
Monday, May 24, 2010
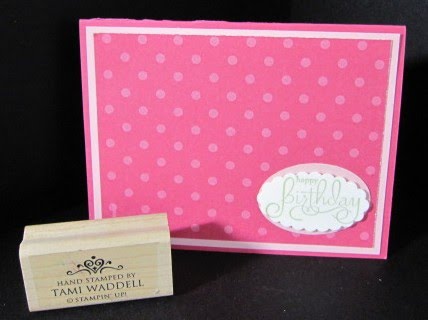
May Stamp Club Make 'n Take

Using the Big Shot Outline


Thursday, May 20, 2010
Distressing Tips
As most of you know, I love vintage and collage and I am so happy to see it coming back in style. Here are a view tips to create your distressing effect.
The main idea is to make your card, scrapbook page or whatever you are working on to look old and worn...as if you just pulled it out of the attic or an old trunk.
These ideas are not mine nor are they new but they are 'oldies but goodies'...okay, I couldn't resist!
 Even if you have never been a fan, give it a shot..let your imagination just flow...there is no wrong to vintage!
The main idea is to make your card, scrapbook page or whatever you are working on to look old and worn...as if you just pulled it out of the attic or an old trunk.
These ideas are not mine nor are they new but they are 'oldies but goodies'...okay, I couldn't resist!
- Tearing, ripping or sanding cardstock or paper
- Peel back cardstock, cardboard, or even coffe sleeve holders
- Use a distressing tool...or your fingernail, a bone folder or whatever is handy
- Sponging, edges and really everywhere and anywhere
- Choose a great stamp set that can bring out creativity...Elements of Style is a great choice (Summer Mini)
- Inking; several techniques, direct to paper (one of my newest favs) sponging, spritzing
- Layering so that different layers show through...like old wallpaper
- Old books, dictionaries, maps, sheet music anything to add interest...even old dress patterns
Monday, May 3, 2010

Sunday, May 2, 2010


Sunday, April 11, 2010
Dry Embossing
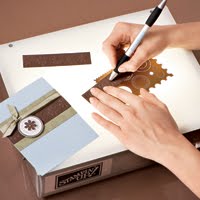
Directions
1. Secure a brass template to a light source with a small piece of tape (temporary)
2. Rub waxed paper on the back surface of the card stock so the stylus will glide more smoothly and to help prevent tears in the paper.
3. Place the paper or card stock face down over the template, positioning it so that you'll have the image where you want it.
4. using the stylus tool, press the paper through the open areas of the template to produce your raised image.
Saturday, March 27, 2010


Subscribe to:
Posts (Atom)